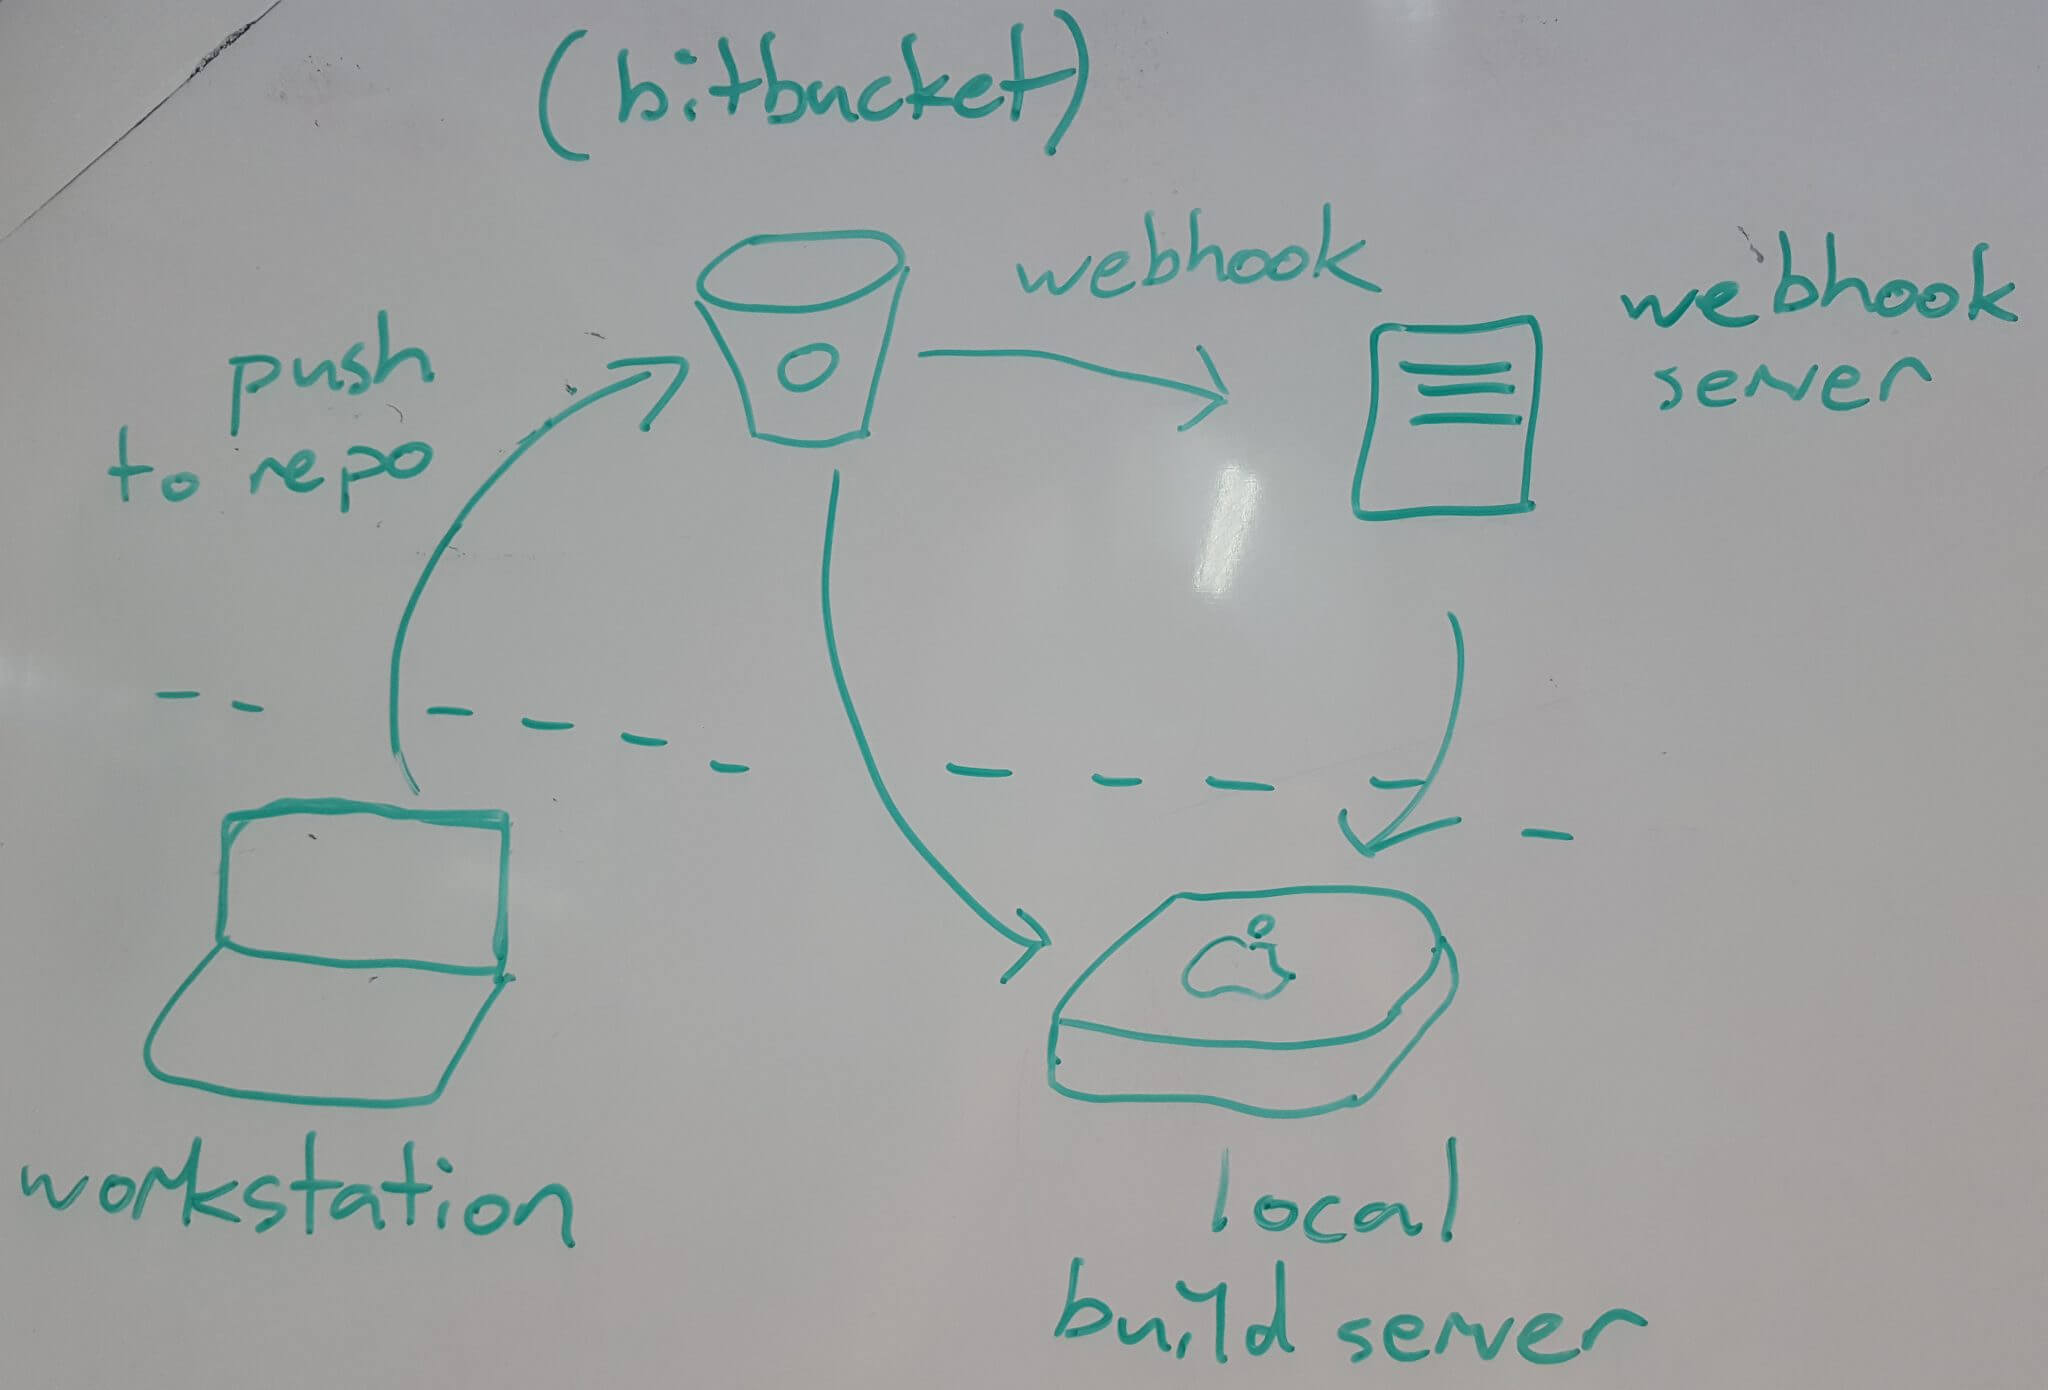
How We Made A Build Server Using Webhooks, Fastlane And Bash (Part 1)
January 21, 2019
Local Scopes In Laravel
February 28, 2019
The next step in creating the build server is getting the build script to run on the local build server.
- 1. Install zerotier on build server and webhook server
- 2. Setup ssh keys
- 3. Setup script to send through data
1. Install zerotier on build server and webhook server
You should have a webhook server setup as described in our previous blog post How We Made A Build Server Using Webhooks, Fastlane And Bash (Part 1).
Follow the instructions for downloading and installing zerotier here:
https://www.zerotier.com/download.shtml.
To put it simply, Zerotier can make networks that look like LAN networks over any network. This will allow the webhook server to run a script via SSH on the local build server.
You will need a zerotier account. Once you have created an account at https://my.zerotier.com/. Login and go to the Networks section and tap create to create a new network. Your new network should appear in the list of "New Networks" or "My Networks". Click the new network to see details.
Copy the NetworkID at the top of the screen, you can use this to join the network from any zerotier client. In ubuntu (or mac) as we have setup the webhook server, this requires the zerotier-cli command:
zerotier-cli join a0cbf4b62a76c663
You should see something in the terminal like `200 OK`. Next this computer needs to be authorised to join the network from the dashboard. Using the same process add the build server.
When both machines are authorised and connected you should be able to see their zerotier ip addresses in the dashboard.
2. Setup SSH key
https://www.ssh.com/ssh/keygen/
For our setup put our webhook server's public ssh key in the build server's authorized_keys file. This allows the webhook server to access the build server directly. It would be more secure to have Webhook installed on the build server too, this would mean that if the webhook server was compromised your build server would not be. Or possibly even for the webhook server to simply route webhook requests directly to the build server.
3. Setup scripts to send through data
As setup in the previous blog post the webhook server parses the webhook body into a shell script:
#!/bin/bash
echo $1 # username
echo $2 # new type
echo $3 # branch_name
echo $4 # commit_hash
echo $5 # commit_message
echo 'ios-push-webhook'
# /Users/lavalamp/test_ios.sh "$1" "$2" "$3" "$4" "$5"
echo "https://lavalamplab.b-cdn.net/Users/username/build_serve.sh "\""$1"\"" "\""$2"\"" "\""$3"\"" "\""$4"\"" "\""$5"\" | ssh username@255.255.255.255
The first five echo statements are for keeping logs and showing what the arguments are to this command. This script then simply passes on these arguments to the build_serve.sh script on the build server
Conclusion
Although this method can be improved upon, it is great for a proof of concept.
Next time we will be showing off the build server shell script that we're sending arguments to.


